|
|
FAQ - How to setup my MySql Client |
|
DoliCloud is an Opened hosting solution. This means, you can view, modified and download program and data files. One of the interfaces to keep control on your data is using a Mysql client. Mysql is the database used to store your data. So you can use any Mysql compatible client to read directly your data into database. This page describes how to setup your MySql client.
Note that connecting directly to your DoliCloud database will allow you to view but also edit data directly. Because edit is done directly into database, if you don't have technical kownledge of how the database was designed, there is a risk to break data integrity, so to break your instance stability. Do this at your own risk.
1-Get your MySql credentials
- Go onto the DoliCloud dashboard URL https://myaccount.dolicloud.com/ - Choose menu "Applications and Options". - You will find credentials to connect on Mysql, after choosing the tab "Database" on the instance. You will find hostname, port, database name, db username and db password. - Next step is to launch your MySql client with this credentials...
2-Launch MySql client
You can use any Mysql compatible tool (MysqlWorkbench, PHPMyadmin, etc...) to access to your database. All you need is credentials found previously at step 1. However, setup of such tools can't be described here as it depends on the tool, so please refer to their documentation. This is some example of current client.
Launch Mysql command line client
Once you have your credentials, you can launch your mysql client (we suppose you have installed Mysql product onto your computer to have the mysql command line tool available). mysql -A -u username -p'password' -h hostname -D database_name
Note that there is no space after -p and that password is quoted.
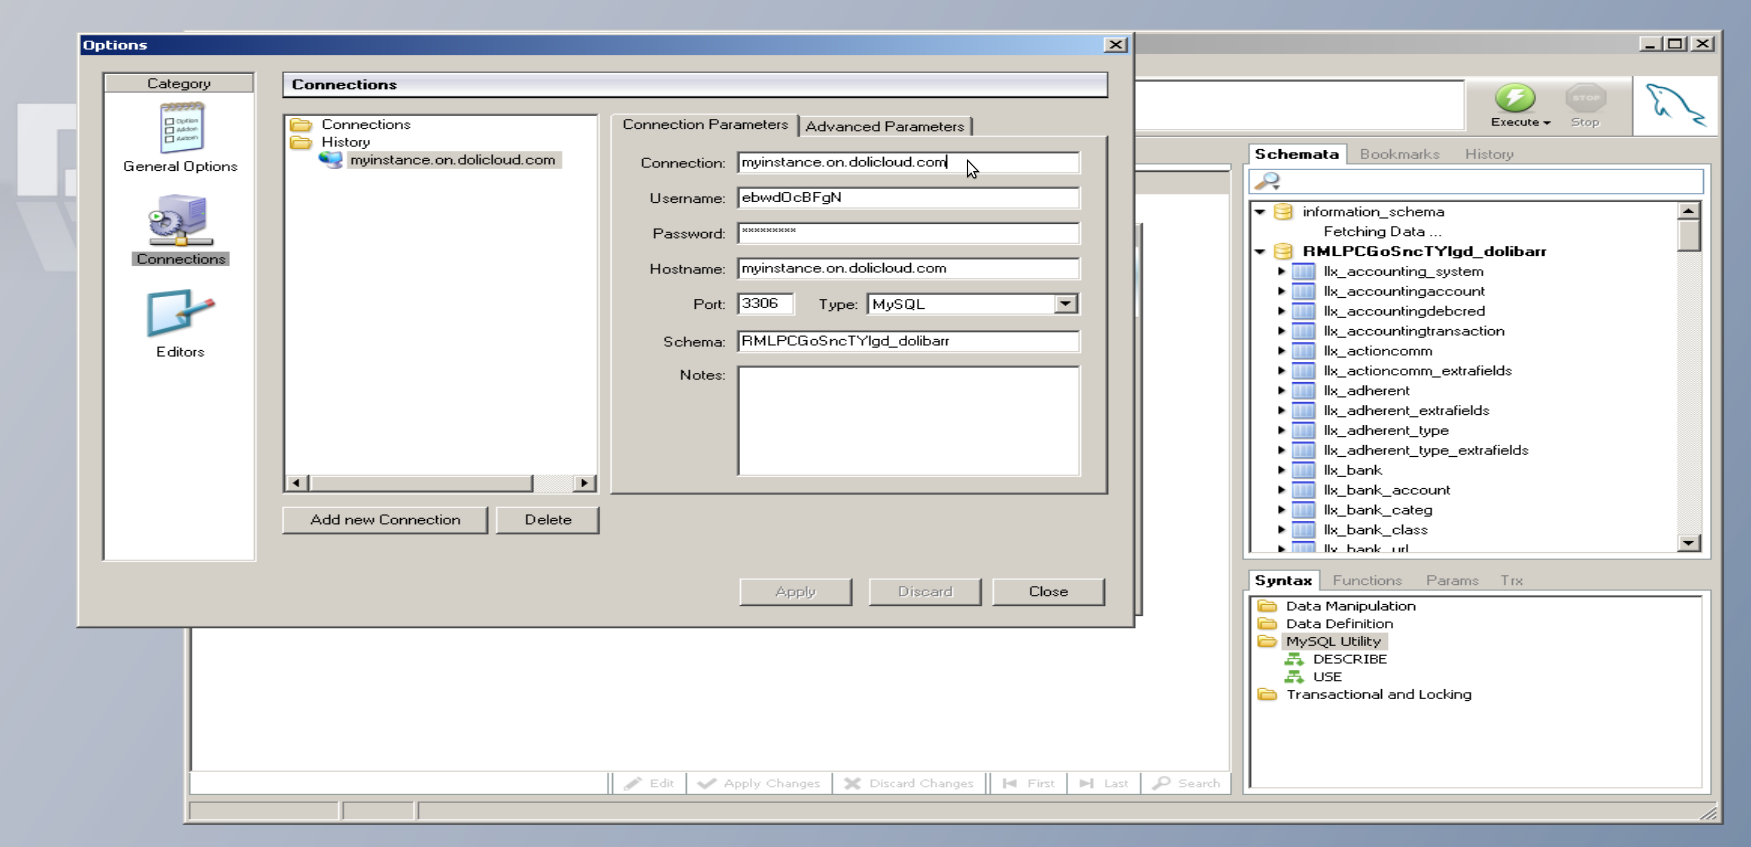
Launch Mysql Query
This is another example of setup with MySql Query software for Windows.
Connection: Entrez un nom quelconque Username: Entrez le Db username trouvé à l'étape 1. Password: Entrez le Db password trouvé à l'étape 1. Hostname: Entrez l'information Db Server trouvé à l'étape 1 (par exemple myinstance.withX.dolicloud.com ou 176.9.35.249) Schema: Entrez l'information Db Name trouvé à l'étape 1.
Après avoir cliqué sur "Apply", votre entrée de connection est créée et l'accès opérationnel (la liste des tables doit apparaître dans la fenêtre suivante).
FAQ written by DoliCloud support team. |